This guide is required if you have an R-series NVR and H-series Cameras.
Step 1. Configuring The H-series Camera
The best way to do this is to connect the camera directly into your computer or router and power the camera separately using a 12vDC power supply, or use a PoE switch like we used in this guide.
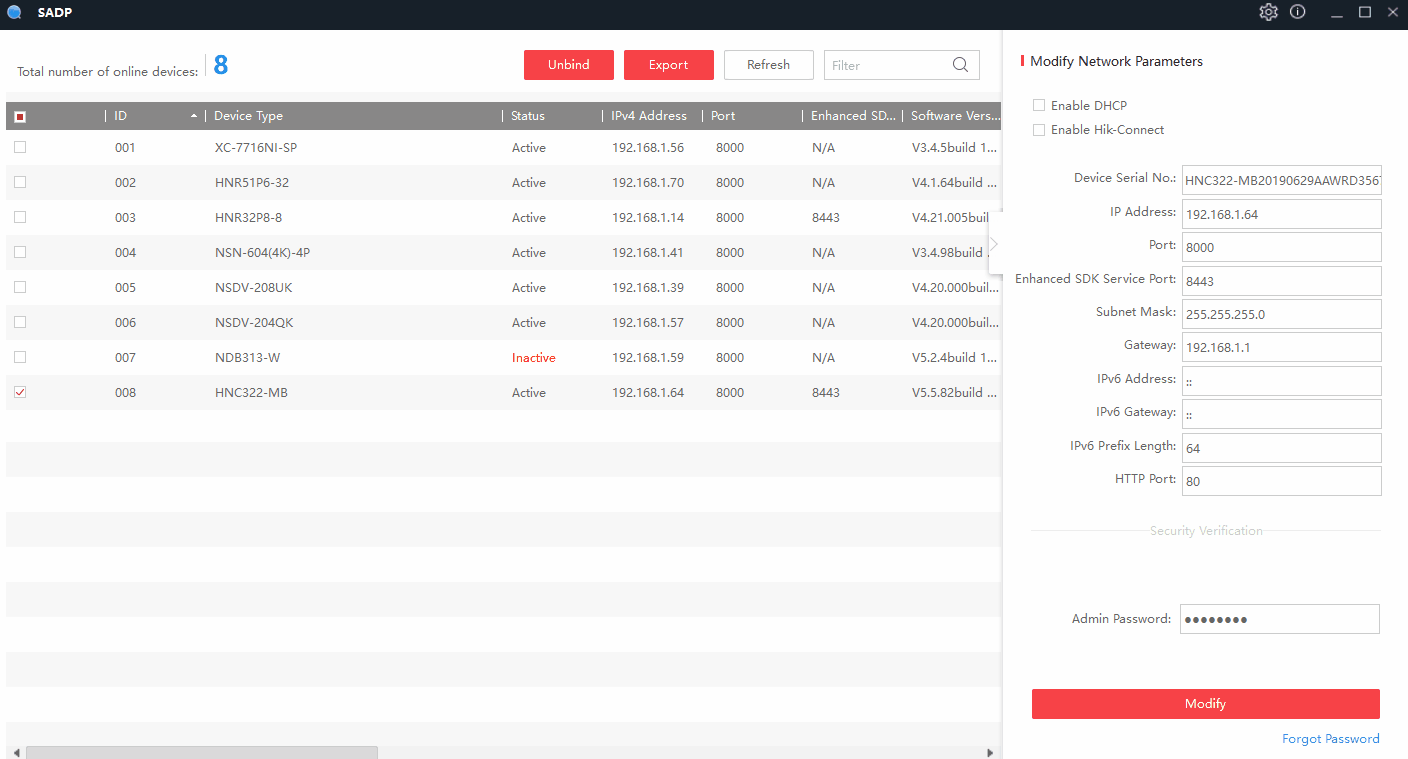
Once the camera is connected,run the SADP Tool and modify the camera's IP address to match the internal subnet of the R-series NVR (10.10.25.x)
In this guide, we are making the H-series camera's IP address "10.10.25.101" and setting the Gateway to "10.10.25.100".
Please Note!
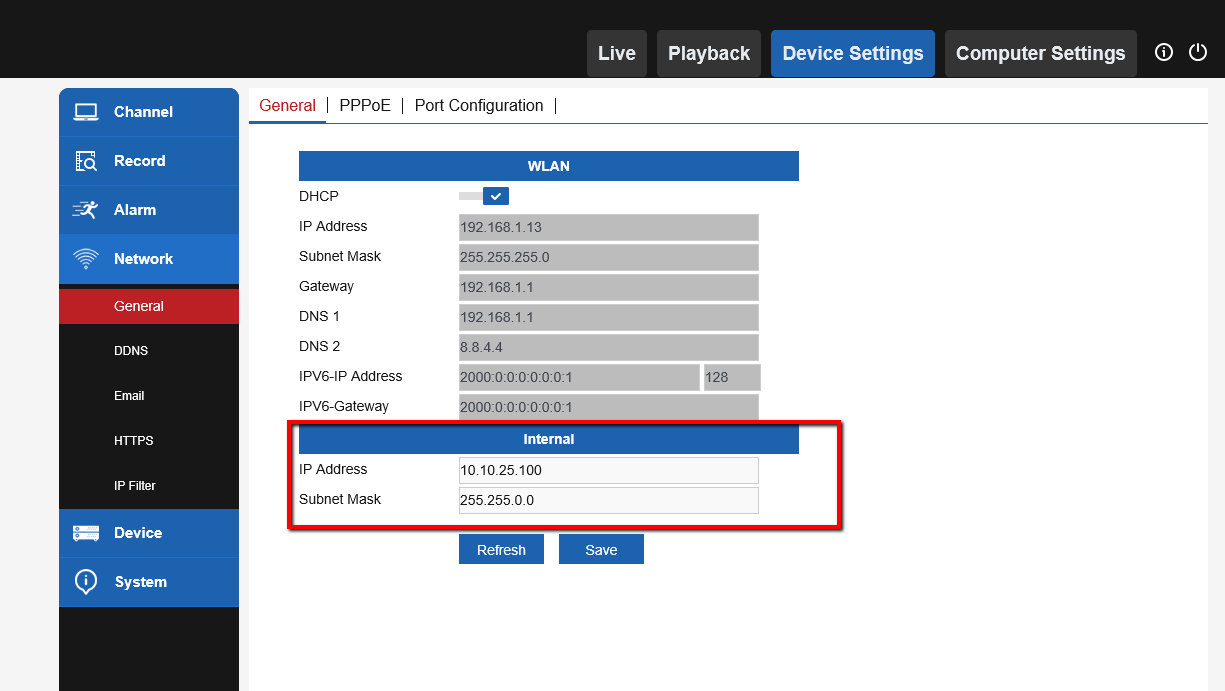
Do not set the camera's IP the same as the NVR's internal IP, which is "10.10.25.100"
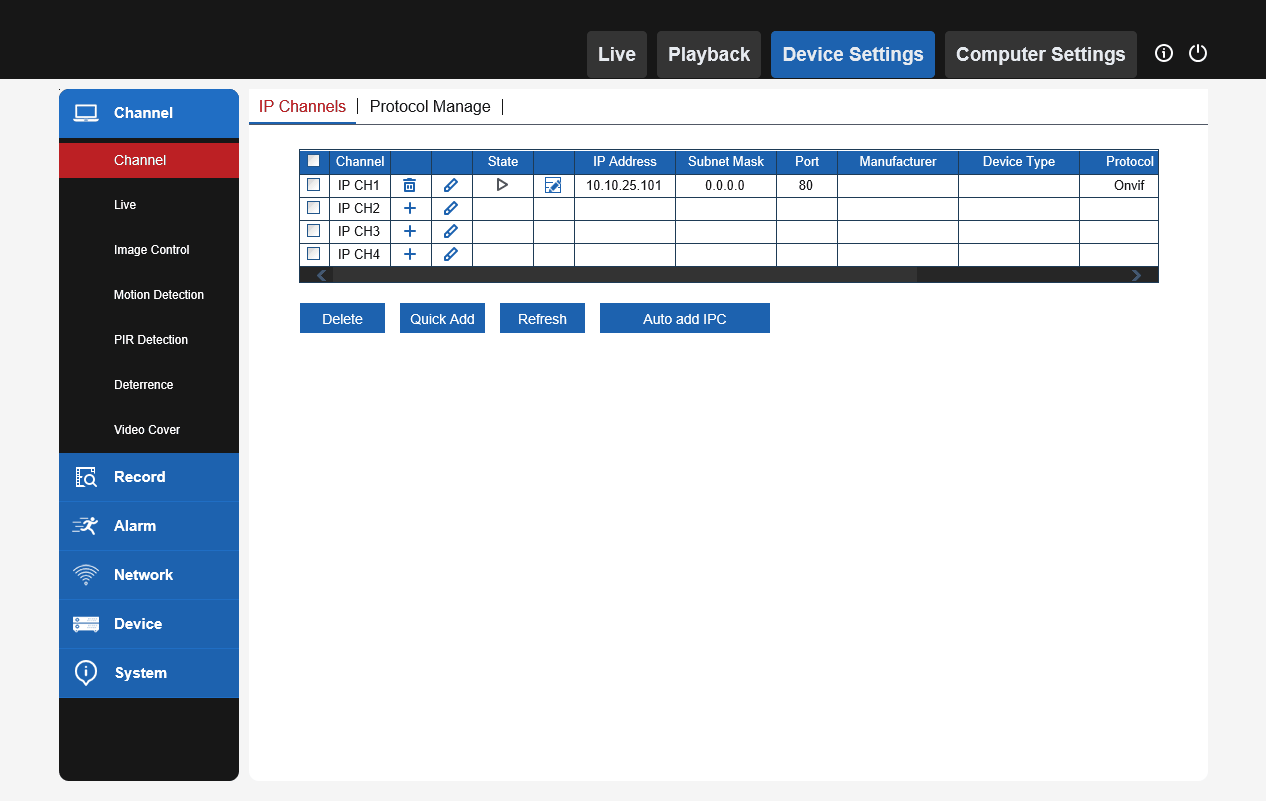
Step 2. Plug The H-series camera into the R-series NVR & Configure
In this guide, we connect the H-series camera into Channel 1 on the R-series NVR.
We are also accessing the R-series NVR via the CamViewer Software on a local PC.
First, Click on the Pencil Icon for the needed Channel and Change the Switch Mode from Auto to Manual. Click OK
Next, click on the + icon for the needed channel and input the IP address, port(80), Protocol(ONVIF), and login info of the H-series camera and hit OK.
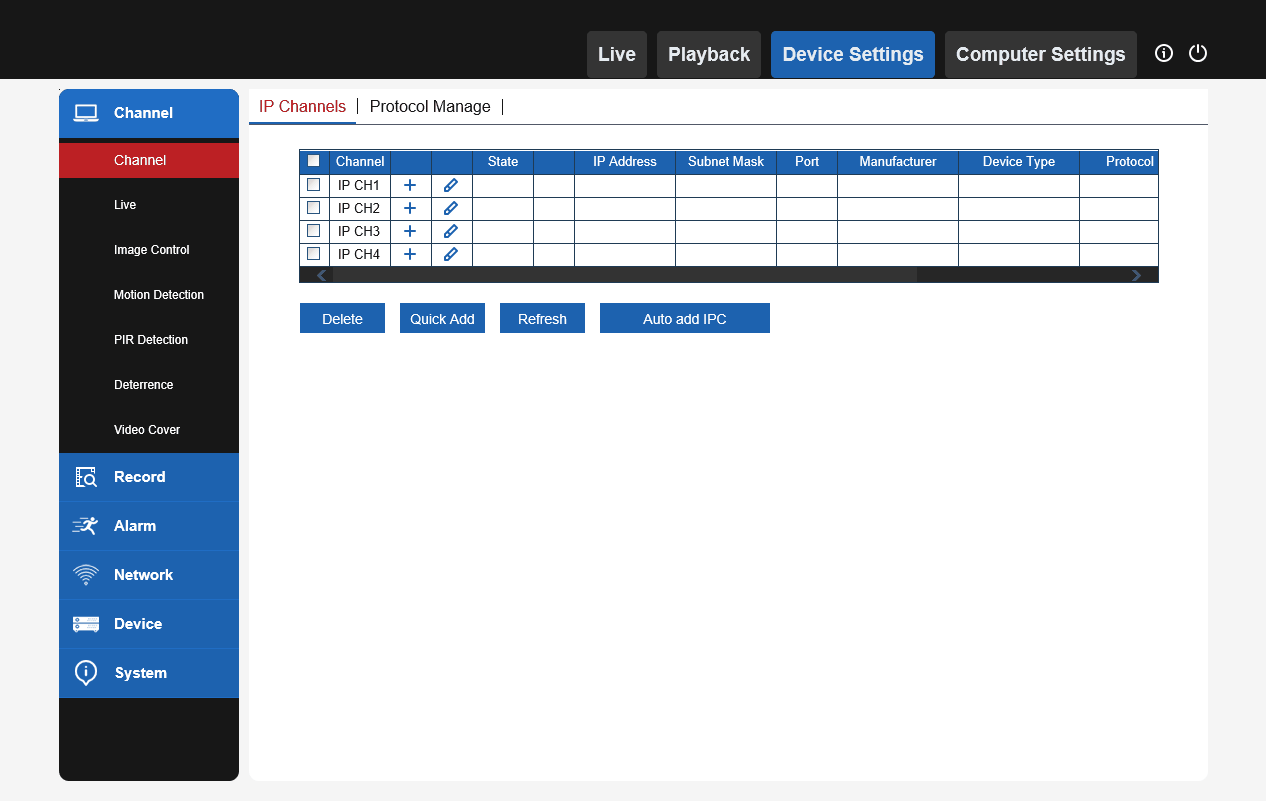
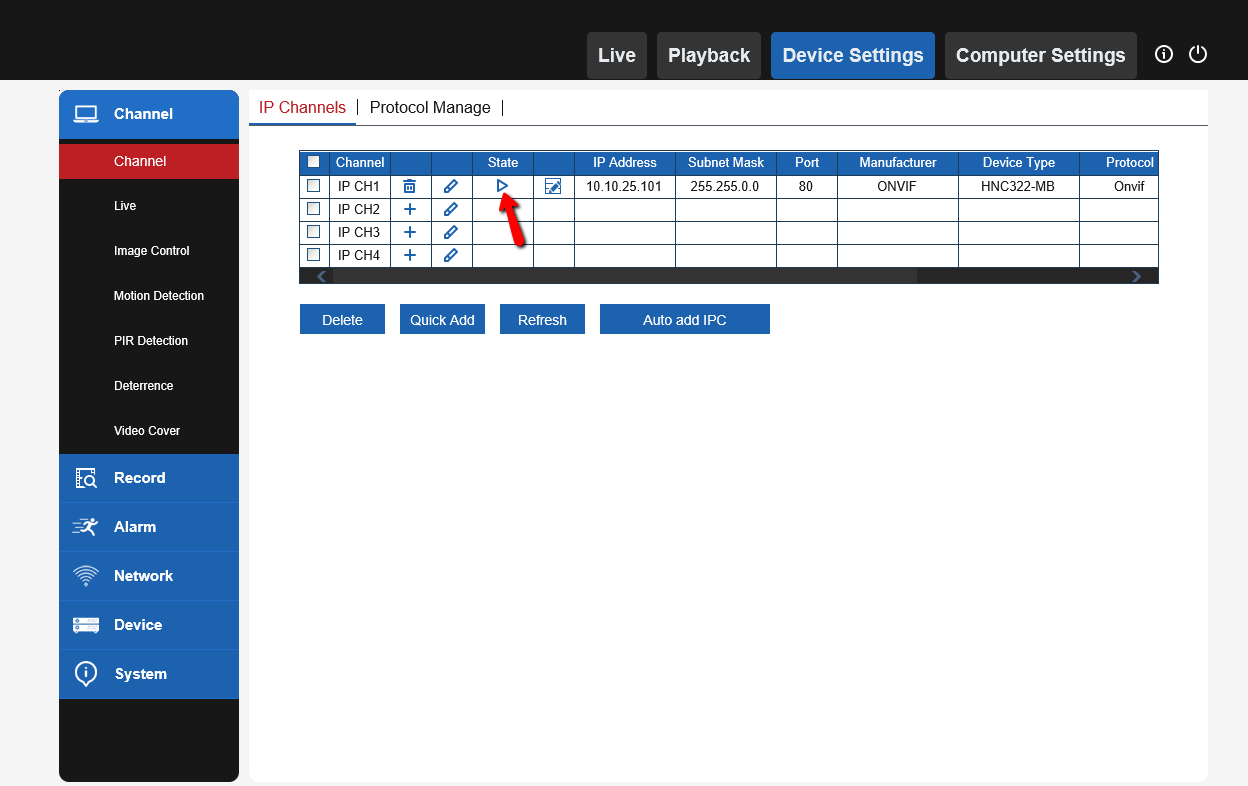
Now, click on the Pencil&Paper Icon to input some additional info. Such as the Subnet Mask and Gateway. Then click OK
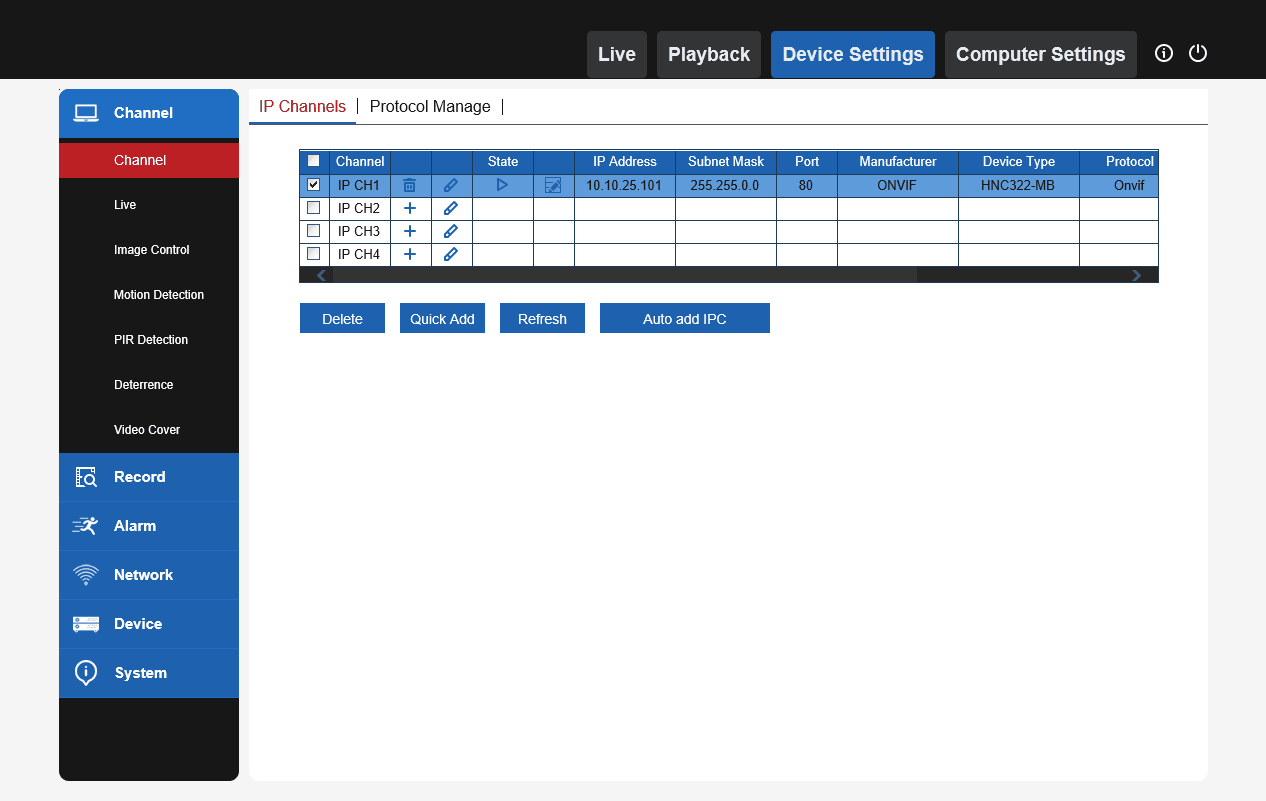
After the camera info has been entered correctly, the State Icon for the channel will turn from Grey to Blue
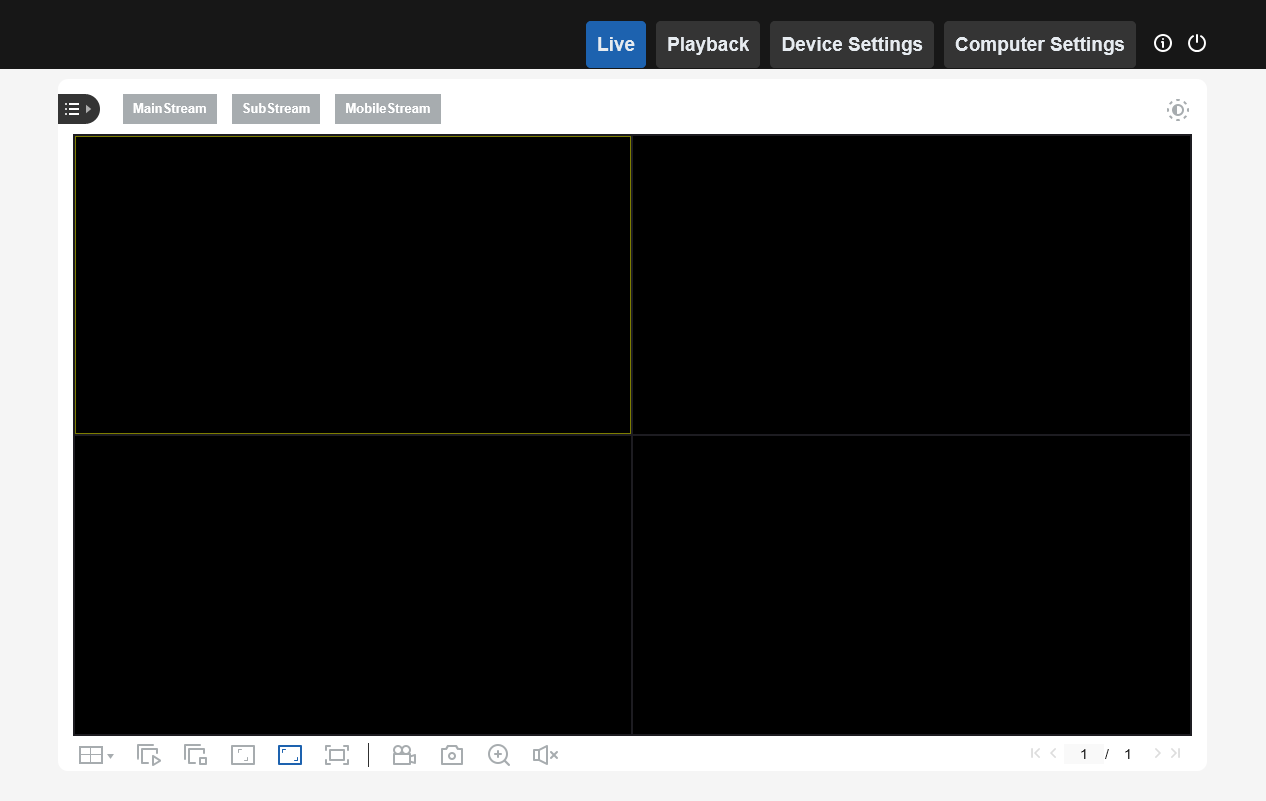
Now its Live! Click on Live Tab at the top to view the camera
If you are having trouble adding the camera still, you may have to configure a couple settings in the camera itself. Please check out this guide