By Default, a camera's name when added to a H-Series NVR is "Camera 01".
Having the ability to change the camera name can keep your system organized and easier to navigate.
Step 1. Log Into the NVR via Web Interface
Log into your NVR via Internet Explorer and click on the Configuration tab at the top. Then click on Image on the left. Lastly OSD Settings along the top.
You will have to adjust and name each camera one at a time. Select the camera you want to work on from the drop-down list at the top.
Step 2. Modify OSD Settings For The Camera
Check the boxes that you want to see information for:
- Display Name = Camera's Name or Location Name
- Display Date = Shows the Date
- Display Week = Shows the day of the week

In the unfortunate event that something occurs on camera that you need to share with law enforcement or other agencies, it’s good practice to have all of these items checked. The more information they have, the more helpful they can be.
Device Name - Camera's name here. In this example, we named it "Test Cam 123"
Time format – 12 hour (what most people are accustomed to) or 24 hour (military time)
Date format – sorts the month, date, and year order.
Text Overlay – You can name this whatever you like. it's additional information that you can have listed on the Live View of the camera itself.
Be sure to click "Save" once you have finished.
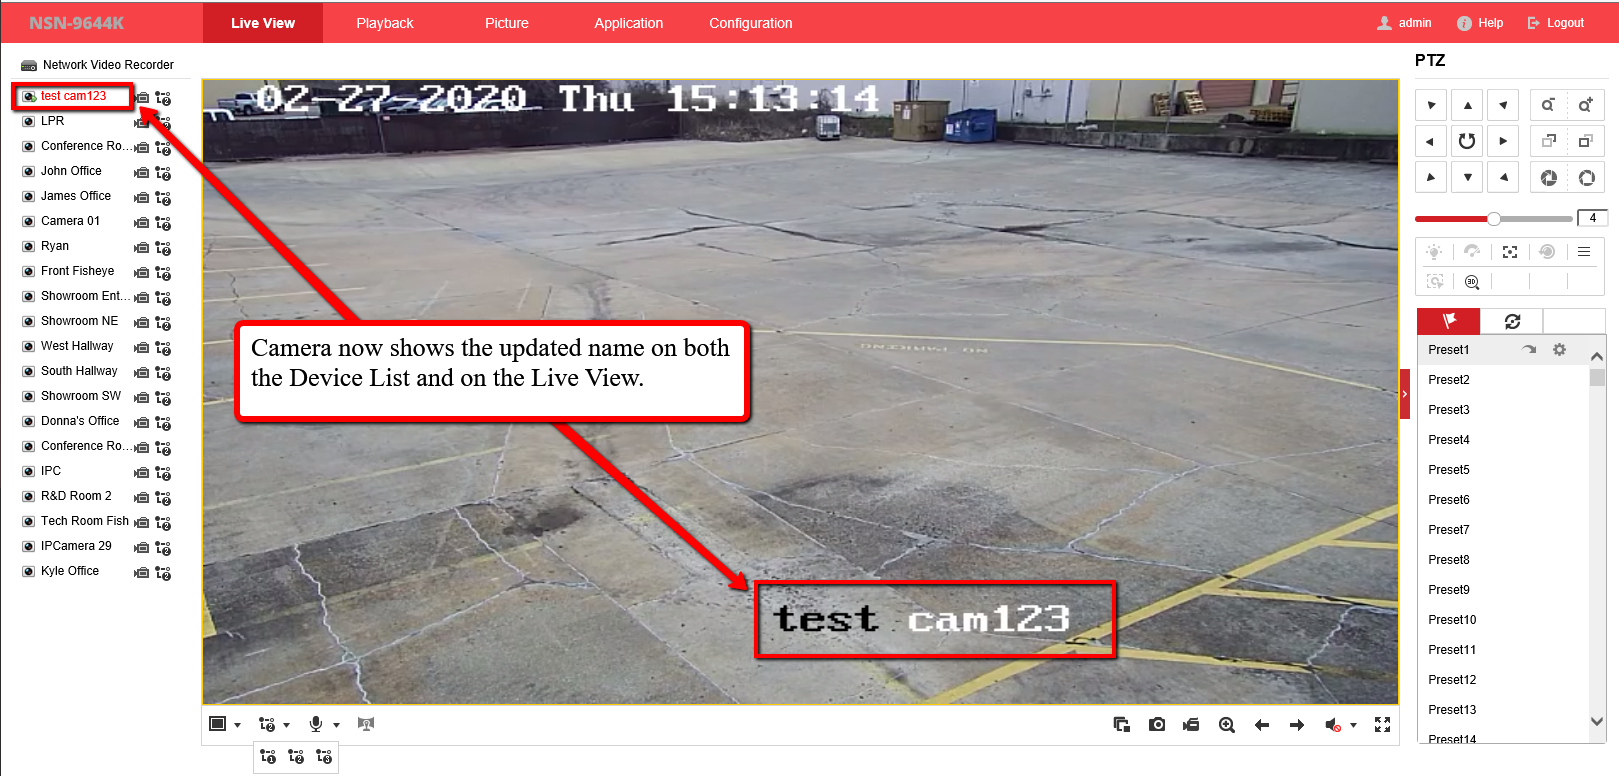
Step 3. View The Changes Via Live View
Now go back to the Live View tab. When you're there, you'll see the names you gave each camera instead of the default name each camera comes with which is "Camera 01". Now you'll be able to keep better track of your cameras.