Step 1. Have an Auto Tracking Capable Camera
Step 2. Accessing the PTZ Interface
To set up auto tracking, you do need to log into the PTZ itself via Internet Explorer.
If the camera is connected directly into the NVR, then Virtual Host will be required.
If the PTZ is on a separate switch, then you can Skip Down to the steps where we sign into the PTZ. Step 3
Virtual Host can be accessed through the NVRs web interface on a PC.
You can find the NVRs Ip address using the SADP Tool.
SADP Download
Type in the NVRs IP address into the Address bar on Internet Explorer. Then you will get a sign in screen for the NVR.
After signing in. Go to Configuration-> Network -> Advanced -> Other -> Enable Virtual Host:
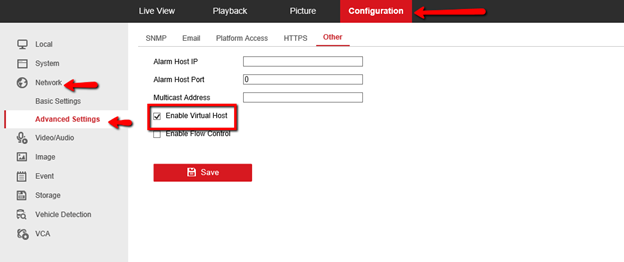
Once enabled virtual host and saved.
Go to: Configuration -> System -> Camera Management and click on the URL that's next to the PTZ:
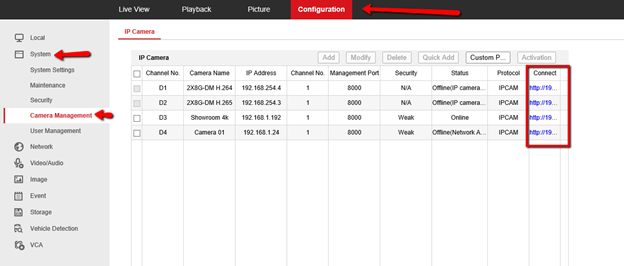
A new tab will open after you click on the PTZ URL.
This is now the cameras login screen. (Here is where you’d start if you had a separate PoE switch).
From here, you will login usually with the same username and password as the NVR, or if it's just the camera on a switch, whatever password you set upon activation.
Step 3. Configuring
The Best Method of Auto Tracking is to have it Linked to a Smart Event (Line Crossing / Intrusion Detection). In this guide, we will be using LIne Crossing.
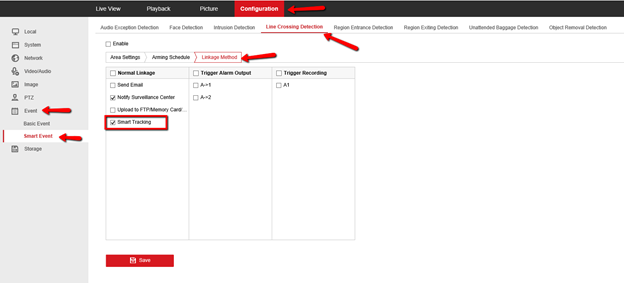
Go to Configuration -> Event -> Smart Event -> Line Crossing.
Once you have set the line drawn and enabled, go to "linkage method" and enable "smart tracking":
Now anything that triggers the smart event will enable the smart tracking.
To fine tune the fine tracking such as zoom ratio and duration of tracking, you will need to go back to the Smart Tracking Tab under PTZ.