In this guide, we will show you how to view your R-Series camera from your computer using the CamViewer desktop application.
Download and Launch the CamViewer Application
You can install the program from the software CD that came with your camera, or you can click here to download it from our QuickStart page.
Log Into Your Camera
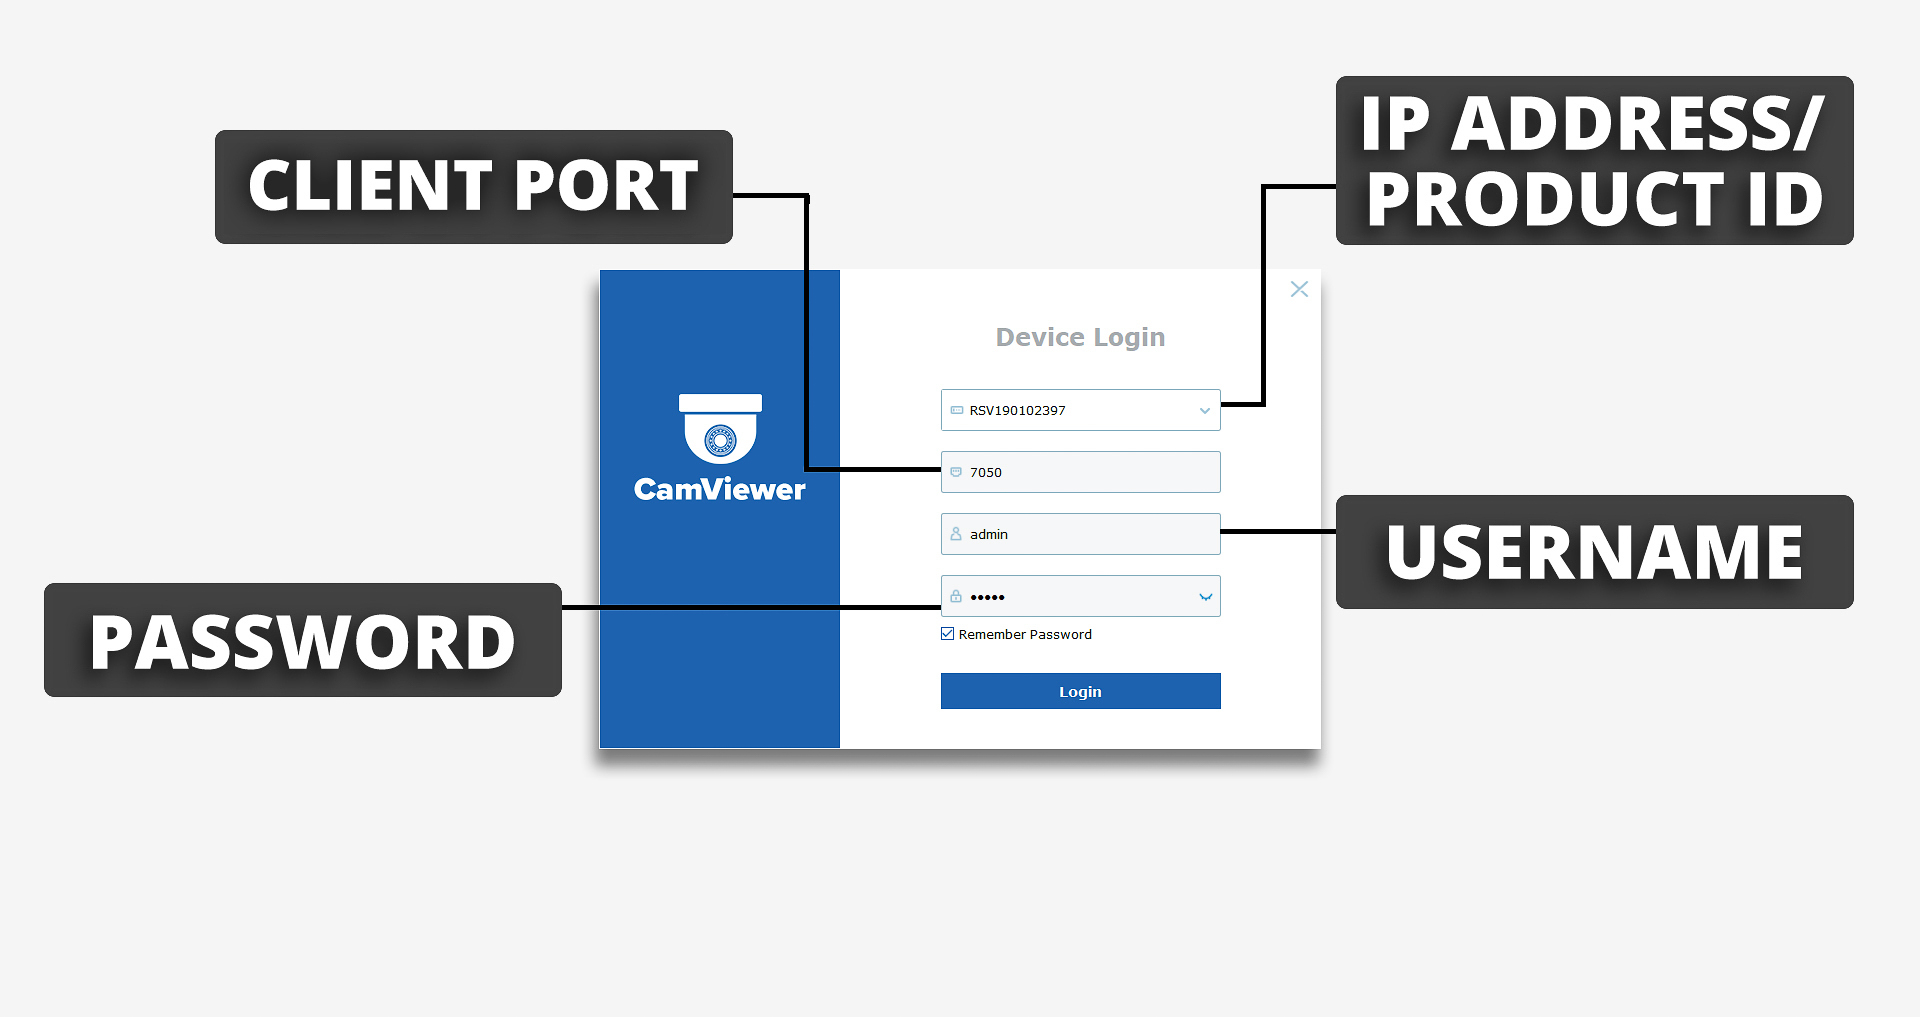
Click the image above to view full size.
Enter the following credentials and click the "Login" button.
| 1 | IP Address/Product ID: | Your cameras's Product ID can be found near the QR code, located on the product box or the product itself. |
|---|---|---|
| 2 | Client Port: | 7050 |
| 3 | Username: | admin |
| 4 | Password | admin |
Navigate the CamViewer Application Interface
The entire program is split into three main tabs: Main View, Remote Setting, and System Config.
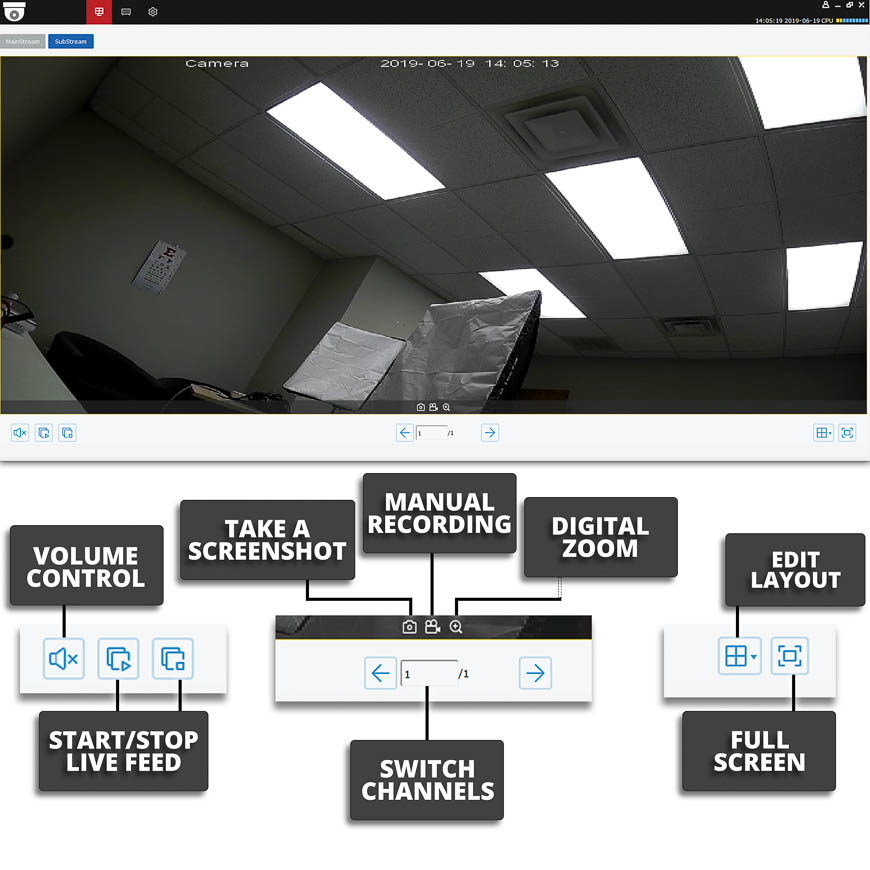
Main View
On the Main View screen, you can view the live feed from your camera. While the main purpose of this screen is viewing, you can also perform simple functions, such as digitally zooming in on your footage, taking a manual snapshot or recording, switching between your mainstream and substream, and more.
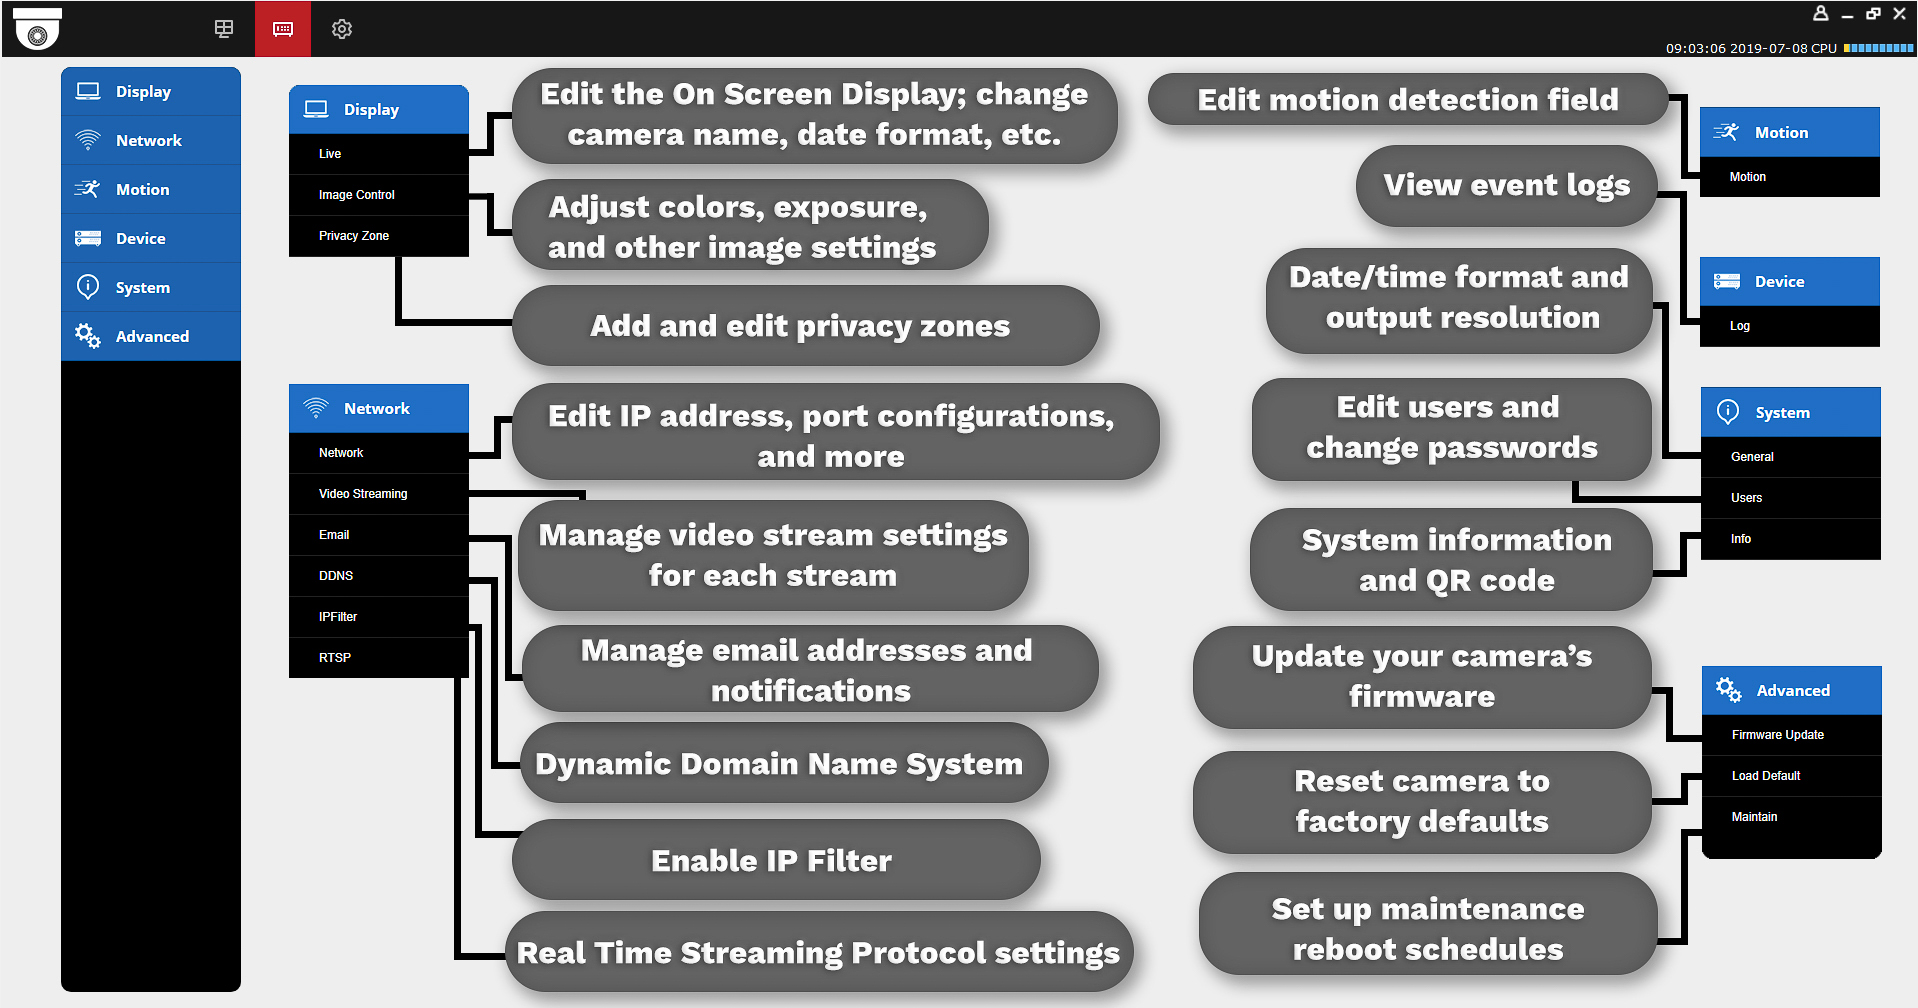
Remote Setting
All of your camera's system menus and preferences are located within the Remote Setting tab. This screen is split into six tabs: Display, Network, Motion, Device, System, and Advanced. To get an idea of what functions you can perform within each of the six tabs, reference the image below.
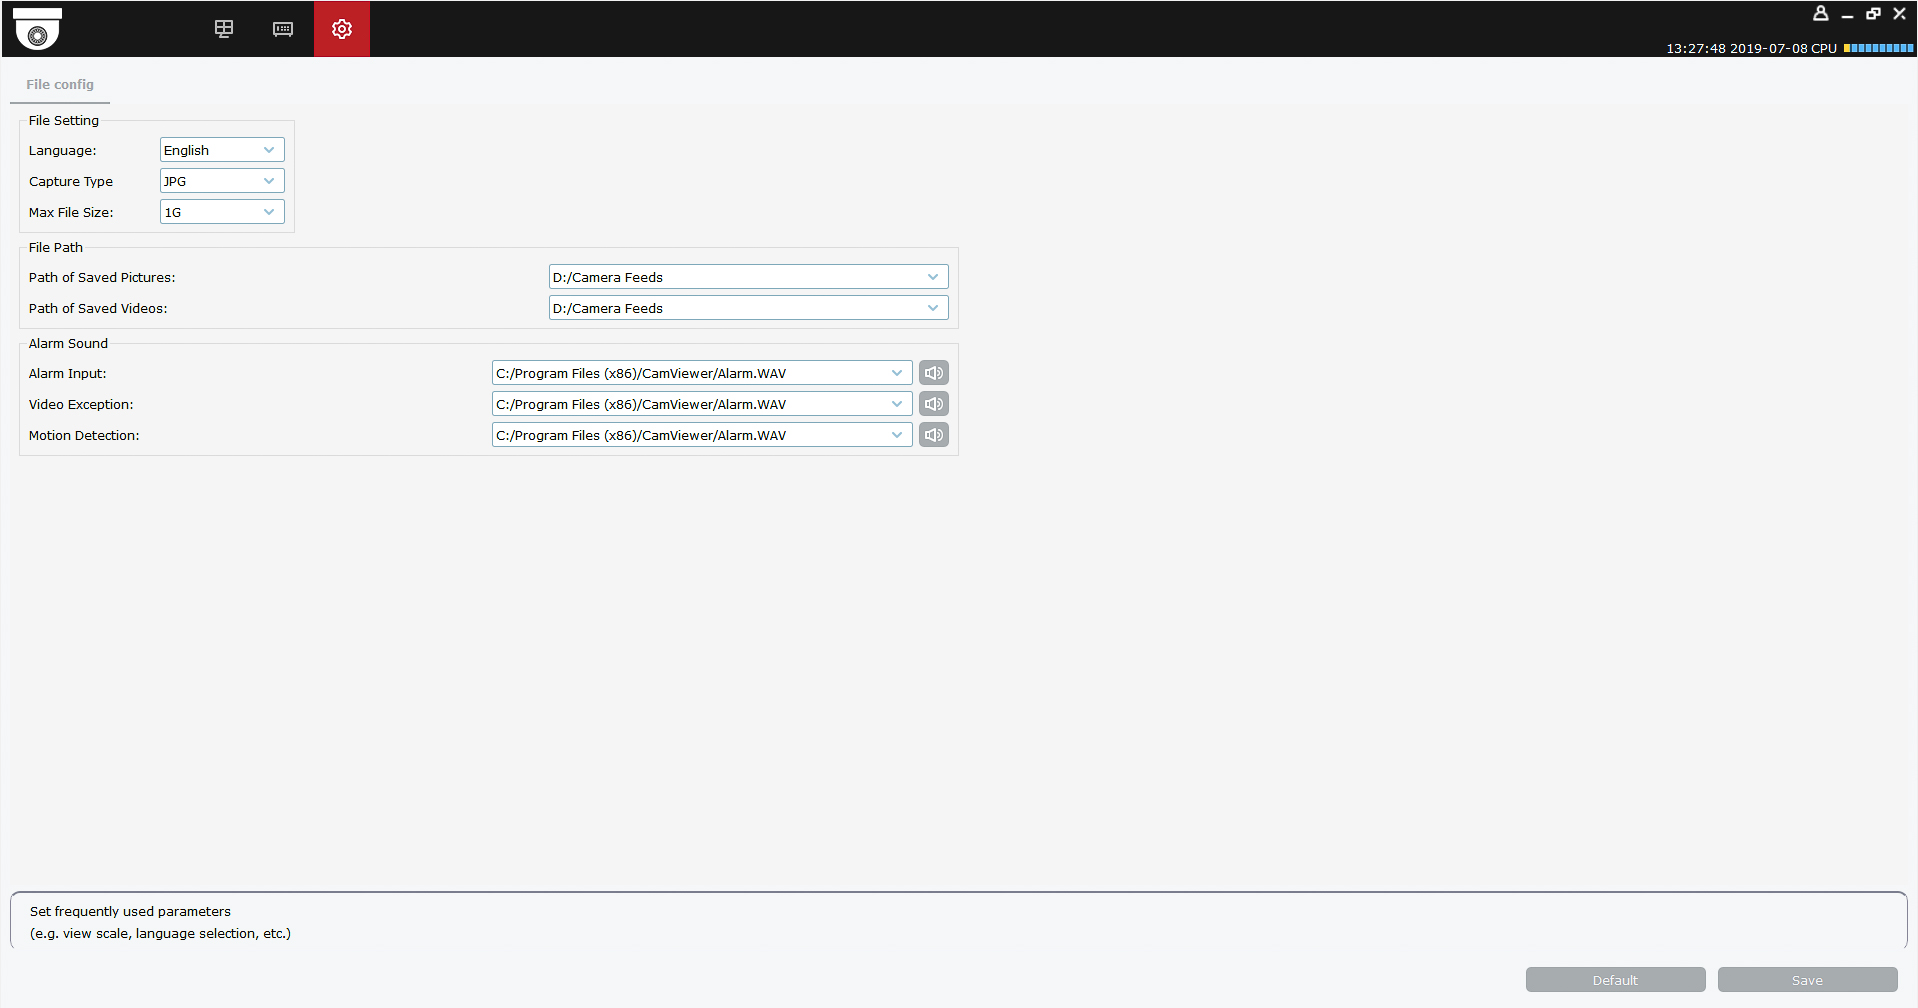
System Config
Within the System Configuration menu, you can set up how your computer works with the CamViewer program. Edit the file settings, file paths for your saved pictures and videos, and edit the sounds your computer makes during certain events.